When the snow starts to fall and the air turns crisp, nothing warms the heart quite like a batch of freshly baked Winter Wonderland Chocolate Chip Cookies. These cookies are more than just a sweet treat—they’re a symbol of comfort, nostalgia, and the simple joys of the holiday season.
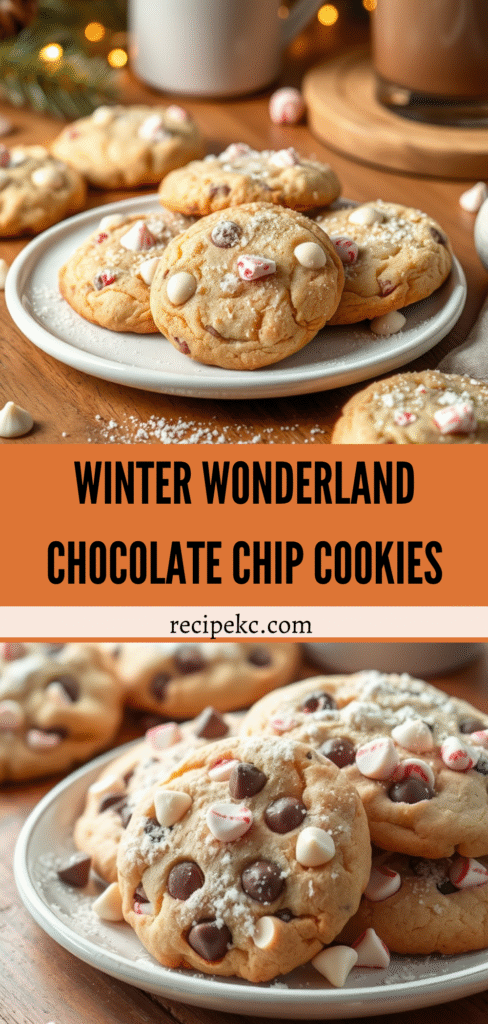
Imagine biting into a soft, chewy cookie filled with rich chocolate chips, a hint of peppermint, and a dusting of sparkling sugar that glistens like fresh snow. Whether you’re baking for a holiday party, a family gathering, or just a cozy night by the fireplace, these Winter Wonderland Chocolate Chip Cookies will make every bite feel magical.
In this post, we’ll walk through everything you need to know—ingredients, step-by-step instructions, helpful baking tips, and creative ways to decorate and serve your cookies this winter.
Why You’ll Love These Winter Wonderland Chocolate Chip Cookies

These cookies bring together everything we adore about the winter season—comfort, coziness, and festive flavor. Here’s why they’re guaranteed to become your new go-to winter dessert:
- Soft and chewy texture: Buttery and melt-in-your-mouth soft in the center with slightly crisp edges.
- Festive look: White chocolate chips, crushed candy canes, and a sprinkle of shimmering sugar give them a true “winter wonderland” appearance.
- Holiday flavor twist: A touch of vanilla and peppermint extract adds a refreshing wintery aroma.
- Perfect for gifting: Beautifully packaged, these cookies make delightful edible gifts for neighbors, teachers, or coworkers.
- Kid-approved: Fun to decorate and even more fun to eat!
Ingredients for Winter Wonderland Chocolate Chip Cookies

Before you start baking, make sure you have everything you need. These cookies use pantry staples with a few festive extras that elevate them into something truly special.
Dry Ingredients:
- 2 ¼ cups all-purpose flour
- 1 teaspoon baking soda
- ½ teaspoon baking powder
- ½ teaspoon salt
Wet Ingredients:
- ¾ cup (1½ sticks) unsalted butter, softened
- ¾ cup packed light brown sugar
- ½ cup granulated sugar
- 1 large egg + 1 egg yolk
- 2 teaspoons pure vanilla extract
- ½ teaspoon peppermint extract (optional but recommended for winter flair)
Add-Ins:
- 1 cup semi-sweet chocolate chips
- ¾ cup white chocolate chips
- ½ cup crushed peppermint candy or candy canes
- 2 tablespoons coarse sparkling sugar (for topping)
Step-by-Step Instructions
Step 1: Preheat and Prepare
Preheat your oven to 350°F (175°C) and line two baking sheets with parchment paper. This ensures even baking and prevents sticking.
Step 2: Mix the Dry Ingredients
In a medium bowl, whisk together the flour, baking soda, baking powder, and salt. Set aside.
Step 3: Cream Butter and Sugars
In a large mixing bowl, use an electric mixer to cream the softened butter with both sugars until light and fluffy—about 2 to 3 minutes. This step is key for that chewy, bakery-style texture.
Step 4: Add Eggs and Flavorings
Beat in the egg, then the extra yolk for extra richness. Add vanilla and peppermint extracts, mixing until fully combined.
Step 5: Combine Wet and Dry Mixtures
Gradually add the dry ingredients to the wet mixture, mixing just until combined. Don’t overmix—this keeps your cookies soft and tender.
Step 6: Fold in the Chocolate and Peppermint
Using a spatula, gently fold in the semi-sweet and white chocolate chips, along with crushed candy canes. The mix of colors will already start to give that wintery look!
Step 7: Scoop and Sprinkle
Scoop the dough into 2-tablespoon portions (or use a cookie scoop) and place them on the prepared baking sheets about 2 inches apart. Sprinkle each cookie with a pinch of coarse sparkling sugar for that frosty, snowy sparkle.
Step 8: Bake
Bake for 9–11 minutes, or until the edges are slightly golden and the centers look set but soft. The cookies will continue baking slightly on the hot pan after removal.
Step 9: Cool and Serve
Let cookies cool on the baking sheet for 5 minutes before transferring them to a wire rack to cool completely.
Pro Tips for Perfect Winter Wonderland Chocolate Chip Cookies
- Chill the dough: For thicker cookies, chill the dough for 30–60 minutes before baking.
- Use good-quality chocolate: Real chocolate chips (or chopped baking chocolate) melt better and create delicious puddles of chocolate.
- Avoid overbaking: Pull cookies out just before they look done—the centers should be soft.
- Festive flair: Add edible glitter or white sanding sugar for an extra sparkle.
Variations of Winter Wonderland Chocolate Chip Cookies
These cookies are wonderfully customizable! Try these variations for fun twists on the original recipe:
- Snowflake Cookies: Replace crushed peppermint with mini marshmallows and drizzle with white chocolate for a snowy effect.
- Hot Cocoa Cookies: Add 2 tablespoons of cocoa powder and a handful of mini marshmallows to the dough.
- Nutty Winter Cookies: Stir in chopped pecans or walnuts for a bit of crunch.
- Spiced Winter Cookies: Add ½ teaspoon of cinnamon and a pinch of nutmeg for a cozy, spiced aroma.
- Gluten-Free Version: Substitute all-purpose flour with your favorite 1:1 gluten-free baking flour blend.
Decorating Ideas for a Winter Wonderland Look
The name says it all—these cookies are all about the “wonderland” vibe. Here are some ways to make them sparkle like freshly fallen snow:
- Drizzle white chocolate across each cooled cookie and top with crushed peppermint.
- Add silver or blue sprinkles for a frosty, wintery finish.
- Dust with powdered sugar right before serving for a snow-dusted effect.
- Use snowflake-shaped cookie cutters if you prefer a cutout version of the dough.
These details make your Winter Wonderland Chocolate Chip Cookies look as good as they taste!
How to Store and Freeze
Room Temperature:
Store in an airtight container for up to 5 days. Add a slice of bread to keep cookies soft.
Freezing the Dough:
Roll dough balls, place them on a tray, and freeze until solid. Transfer to a freezer bag and store for up to 3 months. Bake directly from frozen, adding 1–2 extra minutes to the bake time.
Freezing Baked Cookies:
Let them cool completely, then layer with parchment paper in a container or freezer bag. They’ll keep for up to 3 months.
Perfect Pairings
Wondering what to serve with your Winter Wonderland Chocolate Chip Cookies? Try these cozy combos:
- Hot cocoa with whipped cream – the ultimate winter treat!
- Peppermint mocha latte – pairs beautifully with the minty notes of the cookies.
- Warm apple cider – adds a comforting, spicy touch.
- Vanilla ice cream – make cookie ice cream sandwiches for dessert.
Fun for the Whole Family
These cookies aren’t just delicious—they’re also a fun winter baking activity for the whole family. Kids love rolling the dough, sprinkling sugar, and seeing the cookies puff up in the oven. Plus, the peppermint aroma fills your home with festive cheer.
Turn it into a family tradition: bake them while watching your favorite holiday movie or listening to Christmas music. It’s a simple joy that creates lasting memories.
Winter Wonderland Chocolate Chip Cookies Recipe Card
Prep Time: 15 minutes
Cook Time: 10 minutes
Total Time: 25 minutes
Servings: 24 cookies
Ingredients
- 2 ¼ cups all-purpose flour
- 1 tsp baking soda
- ½ tsp baking powder
- ½ tsp salt
- ¾ cup unsalted butter, softened
- ¾ cup brown sugar
- ½ cup granulated sugar
- 1 large egg + 1 egg yolk
- 2 tsp vanilla extract
- ½ tsp peppermint extract
- 1 cup semi-sweet chocolate chips
- ¾ cup white chocolate chips
- ½ cup crushed peppermint candy
- 2 tbsp coarse sugar for topping
Instructions
- Preheat oven to 350°F (175°C). Line baking sheets with parchment paper.
- Whisk together flour, baking soda, baking powder, and salt.
- Cream butter and sugars until light and fluffy.
- Add egg, egg yolk, vanilla, and peppermint extract.
- Mix in dry ingredients until just combined.
- Fold in chocolate chips and peppermint candy.
- Scoop onto baking sheets and sprinkle with coarse sugar.
- Bake for 9–11 minutes or until edges are lightly golden.
- Cool on sheet 5 minutes, then transfer to rack. Enjoy!
Bringing the Magic Home
Winter Wonderland Chocolate Chip Cookies are the kind of treat that instantly makes you feel at home. They’re sweet, festive, and full of winter charm—perfect for sharing with loved ones or gifting during the holidays.
From the first crackle of sugar to the warm scent of peppermint and chocolate filling your kitchen, these cookies are a celebration of everything cozy and joyful about winter.
So preheat your oven, gather your ingredients, and let your kitchen transform into a winter wonderland of flavor.

Winter Wonderland Chocolate Chip Cookies
Ingredients
Method
- Step 1: Preheat and PreparePreheat your oven to 350°F (175°C) and line two baking sheets with parchment paper. This ensures even baking and prevents sticking.
- Step 2: Mix the Dry IngredientsIn a medium bowl, whisk together the flour, baking soda, baking powder, and salt. Set aside.
- Step 3: Cream Butter and SugarsIn a large mixing bowl, use an electric mixer to cream the softened butter with both sugars until light and fluffy—about 2 to 3 minutes. This step is key for that chewy, bakery-style texture.
- Step 4: Add Eggs and FlavoringsBeat in the egg, then the extra yolk for extra richness. Add vanilla and peppermint extracts, mixing until fully combined.
- Step 5: Combine Wet and Dry MixturesGradually add the dry ingredients to the wet mixture, mixing just until combined. Don’t overmix—this keeps your cookies soft and tender.
- Step 6: Fold in the Chocolate and PeppermintUsing a spatula, gently fold in the semi-sweet and white chocolate chips, along with crushed candy canes. The mix of colors will already start to give that wintery look!
- Step 7: Scoop and SprinkleScoop the dough into 2-tablespoon portions (or use a cookie scoop) and place them on the prepared baking sheets about 2 inches apart. Sprinkle each cookie with a pinch of coarse sparkling sugar for that frosty, snowy sparkle.
- Step 8: BakeBake for 9–11 minutes, or until the edges are slightly golden and the centers look set but soft. The cookies will continue baking slightly on the hot pan after removal.
- Step 9: Cool and ServeLet cookies cool on the baking sheet for 5 minutes before transferring them to a wire rack to cool completely.
Notes
Pro Tips for Perfect Winter Wonderland Chocolate Chip Cookies
- Chill the dough: For thicker cookies, chill the dough for 30–60 minutes before baking.
- Use good-quality chocolate: Real chocolate chips (or chopped baking chocolate) melt better and create delicious puddles of chocolate.
- Avoid overbaking: Pull cookies out just before they look done—the centers should be soft.
- Festive flair: Add edible glitter or white sanding sugar for an extra sparkle.